
Cedar Tone · Updated September 21, 2026 · Exterior painting
DIY vs. Professional Painting: What You Need to Know
In short: Painting a bedroom yourself is a reasonable weekend project. Painting the outside of a two-story house, spraying cabinet doors, or repainting siding that is peeling to bare wood is where DIY usually costs more than it saves, because the hard part of those jobs is the prep, the primer and the application, not the paint.
The short answer: Painting a bedroom yourself is a reasonable weekend project. Painting the outside of a two-story house, spraying cabinet doors, or repainting siding that is peeling to bare wood is where DIY usually costs more than it saves, because the hard part of those jobs is the prep, the primer and the application, not the paint.
Below is how we’d draw the line, and what our crew does differently on the jobs that belong to a pro.
Where DIY painting makes sense
We are not going to tell you every wall needs a professional. Some jobs are well suited to a homeowner with a roller, a decent brush and a free Saturday:
- A single bedroom, office or closet with walls in good shape and no ceiling work.
- A color change on a wall that is already smooth, clean and previously painted with a similar product.
- A basement or laundry room where a lap mark or a wobbly cut line will never bother you.
- A fence or a short run of railing you can reach from the ground.
The common thread is low risk. If the surface is sound and the room is forgiving, a careful amateur can get a result they are happy with. Buy a good angled sash brush, do not skimp on the paint, and cut in before you roll.
Where homeowners get into trouble is scope. A quick repaint of the main floor turns into moving furniture, patching nail pops, discovering the old paint was a different sheen, and finding out the ceiling looks dingy next to the new wall color. Three weekends later the tape is still up. That is a failure of estimating how much of a paint job is something other than painting.
Prep is most of a painting job
On an exterior, our crew spends more hours on prep than on finish coats, and that ratio is what separates a paint job that lasts from one that peels in two seasons. Here is what prep means on a typical northwest metro house.
Washing. Siding collects a season of pollen, mildew and chalk. Paint will not bond to chalk. We wash, let the house dry, and then start scraping. A homeowner with a pressure washer often does the opposite of what they intend: they drive water into the end grain and behind the laps, then paint over it the next day.
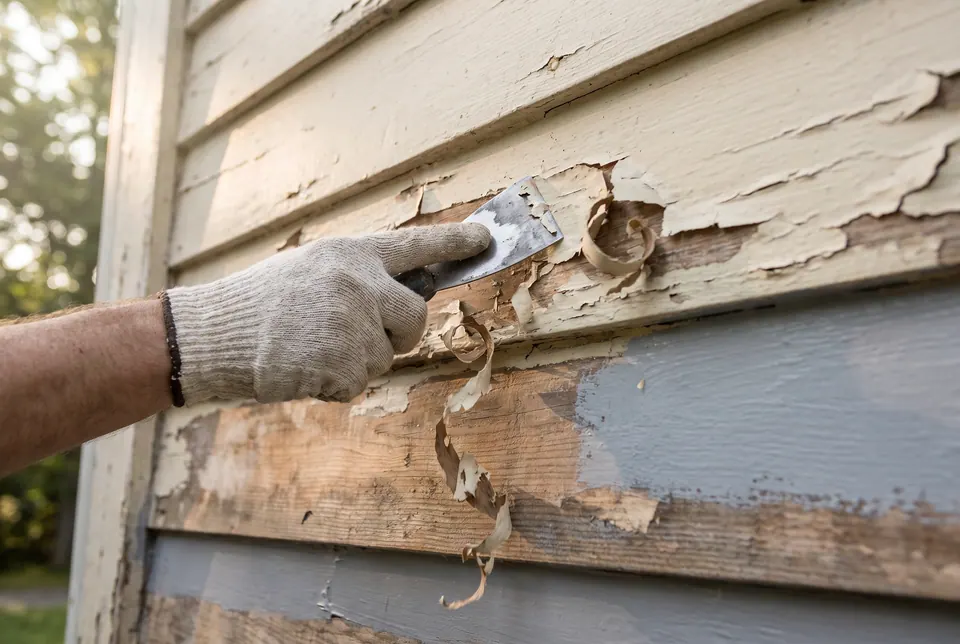
Scraping and sanding. Anything loose comes off. Then the edges of the paint that stayed get feathered so the new coat does not show a ridge. On a 1980s or 1990s two-story in Maple Grove with hardboard lap siding, the bottom edge of each board is where it lets go first, and that means ladder time at every course.
Scuff sanding. Old trim enamel and steel doors are glossy, and new paint does not grip gloss. A scuff with a fine sanding pad dulls the surface so the primer has something to hold. It takes a few minutes a door, and it is the step homeowners skip most.
Caulk and prime. Old caulk gets cut out, not painted over. Any soft trim we find while scraping gets replaced before primer. Bare wood gets primed the same day it is exposed, because Minnesota humidity raises the grain and starts the weathering clock right away.
Very little of that shows in the finished photo. All of it shows three years later.
Why exterior painting is harder in Minnesota
A national article will tell you exteriors are hard because of ladders. That is true, but the bigger issue here is the weather window. Exterior paint needs the siding and the air above roughly 50 F, and it needs overnight lows that stay above the dew point while the film sets. In the northwest metro that gives you a real season from about May to mid-October, and a north wall under trees that may not be dry enough to paint until noon even in July.
A DIY exterior tends to run in fits and starts across that window. You paint the south side in June, get busy, and the north side happens in late September when the mornings are wet and the afternoons are short. The two sides of the house end up with different film quality, and the late side is the one that peels.
Our crew books exteriors in order starting in May and works each house straight through, chasing the sun around the building so every wall gets painted when it is warm and dry. That sequencing is a big part of what you are paying for on an exterior painting job, and it is hard to reproduce on weekends.
Why we spray and back-brush siding
Rented airless sprayers are easy to get and easy to misuse. Spraying alone lays paint on the surface. It does not push paint into the wood or the lap joints, and on rough or weathered siding a sprayed-only coat sits on the high spots and skips the grain.
Our standard on siding is to spray and then back-brush while the paint is wet, working it into the surface before it skins over. It takes two people and roughly doubles the labor on the siding, which is exactly why it gets skipped. Trim gets brushed, period. A brushed edge on a fascia board holds up to freeze and thaw better than a sprayed edge.
Overspray is the other hazard. A sprayer in a light breeze will find your neighbor’s truck, your windows and your roof. We mask everything that is not getting painted, which is another chunk of hours that is invisible in the result.
Why cabinet painting needs a spray booth
Kitchen cabinets are where we see the most DIY regret. Brushed or rolled cabinet doors show every stroke, and wall paint on a cabinet door stays soft enough to fingerprint for months.
On a cabinet painting job we pull the doors and drawer fronts, label them, and spray them off site in a booth with a waterborne enamel that cures hard. The boxes get sprayed in place after the kitchen is masked off floor to ceiling. That is not something you can improvise in a garage in January, and it is the difference between cabinets that look factory-finished and cabinets that look painted.
Where DIY exterior painting usually goes wrong
Most of the DIY exteriors we end up repainting did not fail because of the paint in the can. They failed because of how and when it went on. The same few mistakes show up over and over:
- One coat. A single coat looks finished the day it goes on. It is thin at the lap edges and the corners, and those thin spots are where the color fades and the film lets go first. Our standard is two finish coats over primed bare spots.
- Painting in direct sun. A west wall at four in the afternoon in July can be too hot to touch. The paint skins over before it levels, leaves lap marks, and bonds worse than the same paint on a shaded wall.
- Skipping spot primer. Finish paint on bare wood soaks in unevenly and dries to a blotchy sheen next to the old paint. Primer on every scraped area is what lets two finish coats read as one even surface.
- The wrong sheen on trim. Flat paint on fascia and window trim holds dirt and wears through where hands and weather hit it. Trim and doors want a satin or semi-gloss enamel that sheds water and wipes clean.
- Stretching the paint. Thinning it so it sprays easier, or rolling it out thin to make a gallon go farther, cuts the film thickness the product was made to work at.
None of that takes special talent to avoid. It takes patience and a schedule that lets each wall get painted in the right conditions, which is the part that is hard to fit into weekends.
How to decide between DIY and hiring a painter
Three things decide it: whether the surface is sound, whether all of it is safely reachable from the ground or a stepladder, and whether a visible flaw will bother you every day.
If the surface is sound, the reach is easy and the room is forgiving, paint it yourself and enjoy it. If any of those goes the other way, the money you save on labor tends to come back as a shorter life on the paint, a coat that went on too thin or too hot, or a job that sits half done through a Minnesota fall.
Either way, we are glad to walk the house with you and put the prep and the paint in writing. Send a few photos through our contact page and we’ll get you on the schedule.
Want us to look at your painting project?
Text a few photos and tell us what you are after. We reply with a written estimate.
Related questionsRelated painting questions
Is it cheaper to paint your house yourself?
On labor, yes, for the first coat. The savings shrink fast on an exterior, because you still buy or rent a sprayer, ladders, masking, primer and premium paint, and the prep hours are the same whether anyone pays you for them or not. A job that peels in two seasons because prep was skipped costs more than one professional repaint.
What painting jobs should a homeowner not do themselves?
Second-story exteriors, anything with peeling paint down to bare wood, cabinets and doors that need a sprayed enamel finish, ceilings in rooms with tall walls, and old oil-based trim that needs a bonding primer before latex will stick. Each of those needs equipment, a curing schedule or a primer step the homeowner cannot easily reproduce.
How many coats of paint does a house exterior need?
Two finish coats over primed bare spots is our standard on siding and trim. One coat looks fine the day it goes on, but it is thin at the lap edges and corners, and those thin spots fade and let go first. A big color change can need a primer coat or a third coat to cover evenly.
Why do painters spray and then brush the siding?
Spraying puts paint on the surface. Back-brushing works it into the wood grain and the lap joints while it is still wet, which is where the bond forms. On weathered or rough siding a sprayed-only coat sits on the high spots and skips the low ones. Brushing behind the sprayer takes a second person and roughly doubles the siding labor, which is why it gets skipped.
How long does a professional exterior paint job take in Minnesota?
Most single-family exteriors in the northwest metro take our crew several working days, weather permitting, with the first day or two spent washing, scraping, caulking and priming. Rain and cold mornings push that out. We work each house straight through rather than in pieces, so both sides of the house get the same conditions.